Landed
Cost Module
Topic:
Introduction
to the Landed Cost module in Dynamics 365 for supply chain management.
Agenda:
- 1.
What is a landed cost module?
- 2.
Module benefits
- 3.
Advantage
- 4. Landed cost concepts
- 5. Pre-requisite
- 6. End-to-end process
- 7. Business scenarios
- 8. Transfer orders
- 9. Landed cost vs. Transportation management
1.
What is a landed cost module?
The Landed cost module
helps businesses streamline inbound shipping operations by giving users
complete financial and logistical control over imported freight, from the
manufacturer to the warehouse.
Landed cost provides accurate and
timely cost estimates for overhead landed costs. At the same time, it provides
increased financial and logistical visibility into the extended supply chain.
It also helps reduce the administration of costing and costing errors.
2.
Module benefits: -
·
Improved visibility for tracking
inbound purchase orders and transfer orders
·
Ability to accurately track both
estimated and actual landed costs associated with inbound voyages.
·
Ability for companies to take legal ownership
of goods overseas and accrue item costs while in transit.
3.
Advantages: -
· Provide
More Accurate Information: - It
gives you an accurate calculation and helps you avoid unexpected
expenses.
·
Goods Tracking Information: - A complete
update on each step of transit. Lead time and shipment status are identified.
Users are allowed to change these delivery dates.
·
Helps to Reduce Expenses: - Look at all their expenses
related to the shipping items. Helps to reduce unnecessary costs and
make current costs worthwhile by increasing your profit margin.
4.
Landed cost concepts:
§
Voyages: A voyage is a distinct movement from an
outbound location, through a specific set of destinations over a specified
period, to a specified inbound warehouse location.
§ Folio: A folio is often determined by customs
regulations. It can consist of one vendor's goods for one entity/company per
shipment. The goods in a folio can be in one container or spread among multiple
containers.
§
Journey templets: -
Journey templets are routes that goods moved between two ports.
§
Port: Ports are areas where goods
are received and transferred from.
§
Vessel: A vessel is a
medium that is used to transport goods, such as a ship or an airplane.
§
Shipping container: A
shipping container is used to group goods that are either physically grouped or
have the requirements to share costs across these goods.
§
Activity: Activities
can be used to store each significant step of the journey between two ports.
They can be used to update estimated delivery dates.
§
Goods in transit: The
goods-in-transit refers to the merchandise and other inventory items that have
been shipped by the seller, but not yet received by the buyer.
§
Auto costs: Auto
costs work like a trade agreement. An auto cost is linked to a voyage level.
§
Cost type: Cost types identify costs that are associated with imports,
such as duty, freight, and insurance.
§ Over/under
transactions: - When the orders in a voyage are processed,
the system expects the item quantity that is received in the final destination
warehouse for consumption to match the quantity that is specified on the
purchase order lines that are associated with the voyage. However, because the
exact quantity on the purchase order lines isn't always received in the
warehouse, the Landed cost module defines a set of rules that are
used to handle the over-receiving and under-receiving of goods. These rules are
especially important because the original purchase order has been invoiced and
can no longer be modified. By setting up the details of over/under transaction
policies, you enable the system to determine how to manage the over-processing
and under-processing of goods at the time of receipt. You can also manually
manage over and under inventory by using the Over/under
transactions page.
¨ Over/under
tolerances
¨ Over/under reasons
¨ Item over/under tolerance
groups
¨ Vendor over/under tolerance
groups
· Process
over/under transactions
The Action Pane on the Over/under transactions page
provides the following commands for processing the transactions that are
selected on the page. Each command lets you choose how to process each
transaction.
¨
Create > Movement – Create and post a movement journal
for the selected transaction. For under transactions, a movement journal is
automatically created and posted for the difference between the expected and
actual received quantity. Select this command for over transactions if you want
the vendor to realize the cost difference.
¨
Create > Purchase order – Create a
purchase order for the difference between the expected and received a quantity
of the selected transaction. Select this command for over transactions if your
organization will realize the cost difference.
¨
Create > Transfer to destination – This command
applies only to transfer orders. Select it if you want to transfer the over or
under quantity to the destination warehouse.
¨
Create > Transfer to origin – This command
applies only to transfer orders. Select it if you want to transfer the over or
under quantity to the origin warehouse
5.
Pre-requisite:
·
We need to enable the “Landed cost” feature
within the feature management.

· Configurations:
-
¨ Vendor
setting added for landed cost
When you enable the Landed cost module,
several new fields are added to the existing Vendors page.
You use these fields to set up the vendors that you will use together with
Landed cost features.
To set the relevant fields, go to Procurement and
sourcing > Vendors > All vendors. Open an existing vendor, or create a new
vendor, and then select the Miscellaneous details FastTab.
All the new fields that the Landed cost module adds appear under the Voyages heading.

¨ Landed
cost parameters setup.
You use the landed cost parameters page
to set up general information and configuration settings that are used across
the landed cost module for posting, status updates,
number sequences, and behavior. The setup of parameters is shared across legal
entities and can be modified by an administrator.
To work with the parameters, go to Landed cost
> Setup > Landed cost parameters

¨ Voyage
status setup
On the voyage statuses page, you
establish the set of status values that users can assign to voyages. Users can
assign voyage status values to all levels of a voyage: voyage, shipping
container, folio, purchase order, and item (purchase lines and transfer order
lines). They are used for two purposes:
§
Inform the user about the status of the voyage,
shipping container, folio, purchase order, or item (purchase lines and transfer
order lines).
§
Limit the use of the cost area by preventing
modification or deletion.
To set up your voyage statuses, go to Landed
cost > Setup > Voyage statuses.
Each cost area has its own set and hierarchy of
voyage statuses. Therefore, on the voyage statuses page,
in the cost area field, you must first select the cost
area that you want to view or create voyage statuses for.

¨ Shipping
container setup
Shipping container types define the types of
shipping containers that are available for use during shipping and voyages.
To work with the shipping container types, go
to Landed cost > Containers set up > Shipping container types.
There, you can view, add, and remove records for your container types


¨ Delivery
information setup
Shipping ports identify where goods are being
shipped from and to. For each voyage, a "to" port and a
"from" port are defined, based on the journey that is selected for
the voyage vessel. Shipping ports are used to build the legs of a journey and
the voyage activities. They are typically defined by using the name of the city
and the country or region where the physical shipping port is located.
To work with shipping ports, go to Landed cost >
Delivery information setup > Shipping ports.
There, you can view, add, and remove records for your shipping ports.

¨ Multi-leg
journey setup
Ø Legs:
-
Legs are used to identify separate parts of a
journey. Each leg is built by selecting the "to" and "from"
shipping ports, and the transportation method that is used for that leg. Lead
times can be associated with each leg. Lead times can help track a shipment and
can also be used to calculate the estimated delivery date of the goods on a
voyage. Additionally, when a leg of a journey is completed, the status of the
voyage, shipping container, and associated purchase order lines can be updated
through the tracking control setup. Legs can be used by a single journey
template, or they can be reused by multiple journey templates. Container
loading, customs, and local transport are set up as legs, and a non-specific
shipping port is used for them.
To work with legs, go to Landed cost >
multi-leg journey setup > Legs. There, you can view, open, create, and
delete records for legs.
Ø Journey
Templates: -
A journey template defines the multi-leg
journey between two ports where goods travel during a voyage. The legs of the
journey are combined to identify the amount of time that will be required for
goods to travel from the vendor's point of origin to the final warehouse
destination. When the legs are put on the journey template in a specific order,
the lead times will identify the date of each leg and the status of the voyage,
container, and purchase lines for the voyage.
To work with journey templates, go to Landed
cost > multi-leg journey setup > Journey templates.
There, you can view, open, create, and delete journey templates.

¨ Shipping
information setup
Ø Description
of goods: -
Descriptions of goods help identify a voyage,
shipping container, or folio of goods, and the goods in it. You can select a
description of goods on the shipping container header or the folio header.
To work with descriptions of goods, go to Landed cost >
Shipping information setup > Description of goods.
There, you can view, open, create, and delete records for descriptions of
goods.

Ø Vessels:
-
A vessel is the unique name of a ship or vessel
that a shipping company or agency uses. When you create a voyage, you must
always either select or enter a vessel for it. If you often use the same
vessels, then you can make it faster and easier to create a new voyage by
creating a vessel record for each of them, thereby allowing users to select the
vessel from a list rather than enter the name or number manually each time.
To work with vessels, go to Landed cost >
Shipping information setup > Vessels. There, you can view,
open, create, and delete records for vessels.

Ø Exporters:
-
Each exporter record identifies a vendor or
exporter that can be defined as the vendor for a voyage. The exporter can be
associated with a voyage and used for reporting.
To work with exporters, go to Landed cost >
Shipping information setup > Exporters. There, you can view,
open, create, and delete records for exporters.

Ø Commodity
Codes: -
You use commodity codes to help with customs
identification and the calculation of duty rates for goods on a voyage. You can
select commodity codes on the Released products page.
To work with commodity codes, go to Landed cost >
Shipping information setup > Commodity codes.
There, you can view, open, create, and delete records for commodity codes.

Ø Customs
Description: -
Customs descriptions help identify goods for
customs purposes. You can select a custom description on the Released products page
or purchase order lines.
To work with customs descriptions, go to Landed cost >
Shipping information setup > Customs description.
There, you can view, open, create, and delete records for custom descriptions.

¨ Auto
Costs Setup
You can use the auto costs page
to set up cost rules for various cost areas (such as voyages, shipping
containers, folios, purchase orders, items, or transfer order lines). Based on
the rules, and the fields that users select when they create records for one of
the cost areas, the system calculates the costs and automatically adds them.
Therefore, users do not have to manually add the costs.
To work with auto costs, go to Landed cost >
Costing setup > Auto costs.

¨ Costing
parameter values setup
When you set up the landed cost module,
you can define several sets of common values and related settings per value.
These values will then be available when you select specific types of costing
parameter values in other parts of the app.
We need to do some setup on the costing
parameter page which is given below
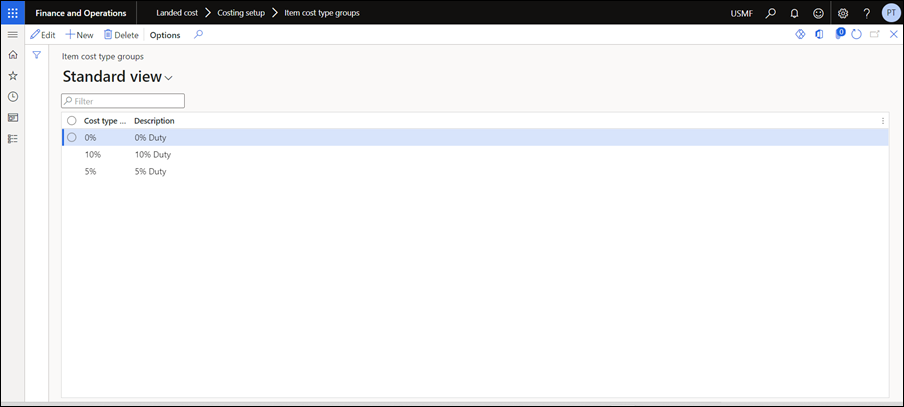
§
Set up cost-type codes
§
Vendor cost type group
§
Item cost type group
§
Transfer order cost type group
§
Cost templates
§
Volumetric divisors


¨ Landed
cost procurement and sourcing parameters setup
The procurement and sourcing
parameters page have a few settings that are especially relevant
when you use the Landed cost module. Use the update order
lines dialog box that is opened from the procurement and
sourcing parameters page to specify whether purchase order lines should
automatically be updated when changes are made on the purchase order header.

6.
End-to-end process: -

7.
Business scenarios: -
· Scenario 1: Purchase order with one shipment
Supplier 1 costs 50$ per product, Supplier 1 charges a fixed fee of
$500 freight for international shipment, and the significant duty rate is 5%.
Purchase order created with 50 quantities.
Cost from Supplier 1: $2500 + $500 freight+$ 5 freight + ($2,500
*.50 Duty+10) = $2,500 + 505 + 135 = $3,140


· Scenario
2: Purchase order with multiple shipments
Supplier 2 costs 70$ per product, and Supplier 2 charges a fixed fee of
$500 freight for international shipment, and the duty rate is 5%.
Purchase order created with 60 quantities but the received quantity
in two containers 30pcs each.
Cost from Supplier 1 (Shipment 1): $2100 + $500 freight+$5
freight + ($2,100 *10% Duty+10) = $2,100 + 500+5 + 210+10 = $2,825
Cost from Supplier 1 (Shipment 2): $2100 + $500 freight+$5
freight + ($2,100 *10% Duty+10) = $2,100 + 500+5 + 210+10 = $2,825


· Scenario
3: Two Purchase orders with one shipment
The same item is purchased from two different vendors and the
quantity is delivered through multiple deliveries.
Purchase 10 units at the price of $100 Per unit.
Cost from Supplier 1 (PO1): $1000 + $500/6 freight+$ 100/6
freight + Duty $200/6 + ($1,000 *5%) + insurance $5000/6 = $1,000 + 83.33+16.67 + 833.33+33.33 +50= $2,016.67


Purchase 100 units at the price of $150 Per unit with a
different vendor but the same product. The delivery of goods is split 50 units
each container.
Cost from Supplier 2 (PO2): $7500 + $500-83.33(PO1) freight +
$100-16.67(PO1) freight + Duty$200-33.33 (PO1) + ($7500*5%) + Insurance
$5000-833.33 (PO1) = $7,500 +416.67+83.33+166.67+375+ 4,166.67 = $12,708.34


Another 50 quantities are received in another container.
Cost from Supplier 2: $7500 + $500freight+$ 100 freight +
Duty$200+ ($7500 *5%) +5000 = $7,500 + 500+100+200+375+ 5000 = $13,675


· Scenario
4: In-transit orders
The item is purchased from the vendors before receiving the
item we process the invoice.
Purchase 100 units at the price of $30 Per unit.
Cost from Supplier 1: $3000 + $500 freight + ($3,000 *5% fuel) = $3,000 + $500+$150 = $3,650


· Scenario
5: Over delivery (Goods are received over against the purchase order)
Supplier 1 costs 50$ per product1, Supplier 1 charges a fixed
fee of $500 freight for international shipment, and the significant fuel rate
is 5%. Purchase order created with 30 pieces. At the time of shipping, the
vendor shipped 27 pieces of that product. The system will automatically create
the purchase order for over 2 pieces.
Purchase 25 units at the price of $50 Per unit.
Cost from Supplier 1: $1250 + $500 freight + ($1250 *5% fuel)
= $1250 + $500+$62.50 = $1812.50


· Scenario
6: Under delivery (Goods are received less than against the purchase order)
Supplier 1 costs 60$ per product1, Supplier 1 charges a fixed
fee of $500 freight for international shipment, and the significant fuel rate
is 5%. Purchase order created with 30 pieces. At the time of shipping, the
vendor shipped 25 pieces of that product. we get less than 5 pieces from the ordered
quantity. We can create a movement journal for the 5 quantities.
Purchase order created for 30 quantities.
Cost from Supplier 1: $1800 + $500 freight + ($1800 *5% fuel)
= $1800 + $500+$90 = $2,390


8.
Transfer orders: -
·
Landed costs are available for
accruing transportation costs for transfer orders between warehouses in a single
legal entity/company F&O.
·
Transfer orders work similarly to
what was described in the purchase order example above however, they do not
have the concept of a goods-in-transit order (Since there is no ownership
change).
·
Transfer orders do work in the
warehouses with “Advance warehousing” enabled.
¨
Ensure you ship the container via the
shipment confirmation button the shipment form vs. the voyages form.
¨
You will have an outbound load and
shipment along with the associated inbound voyages.
· Business
scenarios: -
Scenario1:
- The item is
transferred from one warehouse (W001) to another warehouse (W003) in the same
legal entity by shipping container.
The
landed cost will affect the item.
Transferred qty is 10 units at the
price of $96.68 Per unit. The freight is $ 500.
Cost: - $966.68 + $500freight=
$1,466.68


Scenario2:
- The item is
transferred from one warehouse (W001) to another warehouse (W003) in the same
legal entity by shipping container.
The
landed cost will affect the item.
Transferred qty is 20 units at the
price of $160.28 Per unit. The freight is $ 500, duty is $10.
Cost: - $20*160.28+ $500freight + $
10 duty= $3,722.54


9.
Landed cost Vs Transportation management
system: -
Microsoft
Dynamics 365 Supply Chain Management provides two different modules for working
with transportation: Transportation management (TMS)
and Landed cost.
There
are some differences between both modules.
· Voyages
in landed cost Vs. inbound loads in TMS
¨
You can use TMS inbound and outbound
operations. Although Landed cost provides almost the same functionality as TMS for
inbound operation, it also adds some functionality. Therefore, you might want
to consider using TMS for outbound operations and Landed costs for inbound
operations.
¨
In general, we don’t recommend that
you use both modules together for inbound operations.
§
If you do use the two modules
together, you must not share documents with them. For example, don’t use the same
purchase order for both a load in TMS and a voyage in Landed cost.
§
You must ensure that you don’t set up
the system to create inbound loads automatically. If items from purchase orders
are included in a voyage, they can’t be handled as part of a load.
· Landed
Cost Vs. TMS- Key Considerations
¨
TMS and Landed cost don’t share
reference data for entities such as cost setup, journeys, and legs. If you use
both modules, you must re-create the unshared reference data.
¨
Landed cost doesn’t provide an ASN
for the electronic receipt of goods. Additionally, it doesn’t support warehouse
management mobile app flows that processing load receiving, license plate receiving,
or mixed license plate receiving.
¨
Landed cost provides only limited
support for rate shopping by the vendor. Although you can enter freight
forwarder values, landed cost doesn’t- compare them across multiple vendors.
¨
TMS supports the creation of freight
charges that are connected to transfers. Although these charges can be viewed
from the transfer order, the landed cost isn’t added to the item cost. Freight
reconciliation is supported through the creation of a freight bill that is
based on these charges. This freight bill is then matched against a vendor
freight invoice.


No comments:
Post a Comment